

Q911 Image Flashing Guide
This guide provides instructions for flashing or updating the system image on the Q911 platforms, including EXEC-Q911 and APEX-A100.
Use this guide when you need to re-flash the system image, switch OS, or recover a corrupted system. To update firmware or OS on a deployed device without re-flashing, see the Qualcomm OTA Guide instead.
To obtain an image package, please contact Innodisk sales. We mainly provide Yocto Linux images, built from meta-iQ__manifest. Refer to that repository for the released BSP versions and the image build details.
For Ubuntu, you can choose either of the following:
- Contact Innodisk sales to obtain a validated Innodisk-ported image — see iQ-ubuntu__manifest (no longer maintained since v2.5.1; merged into meta-iQ__manifest) for the available versions.
- Package your own Ubuntu image from the Innodisk image package by following recipes-ubuntu/README.md in meta-iQ__manifest. Innodisk does not validate a self-packaged image, so test the IO functions yourself.
- Yocto Linux and Ubuntu images are flashed with exactly the same procedure below.
- Boards ship with the initial provisioning (UFS provisioning / SAIL) already completed at the factory. You can flash the image directly — the one-time provisioning steps (Provision UFS / Flash SAIL) described in Qualcomm’s documentation are not needed.
This guide follows the official Qualcomm flashing procedure (Qualcomm Linux Build Guide → Flash software images), adapted to the Q911 hardware. Each step below links to the corresponding section of that document.

Requirements
- HW: x86 PC as the host.
- OS: Ubuntu 20.04 or later (recommended). To flash from a Windows 11 host instead, see Flashing from a Windows Host.
- Cable: USB Type-A to Type-C data cable (Type-A → host, Type-C → target). Required — flashing is not possible without it.
- SW: the
qdltool (see Host Setup).
Host Setup (one-time)
You only need to do this section once. If your host is already set up, jump straight to Step 1.
Install the qdl tool
Flashing uses the qdl tool. Build it by following the Build → Linux instructions in the qdl README, which cover the required dependencies; prebuilt releases are also available on the same page.
Set up udev rules
Without this rule, running qdl as a regular user fails with a permission error. Create /etc/udev/rules.d/51-qcom-usb.rules with the following content:
Then restart udev and re-plug the USB cable if it is already connected:
Step 1: Prepare the Board for Flashing
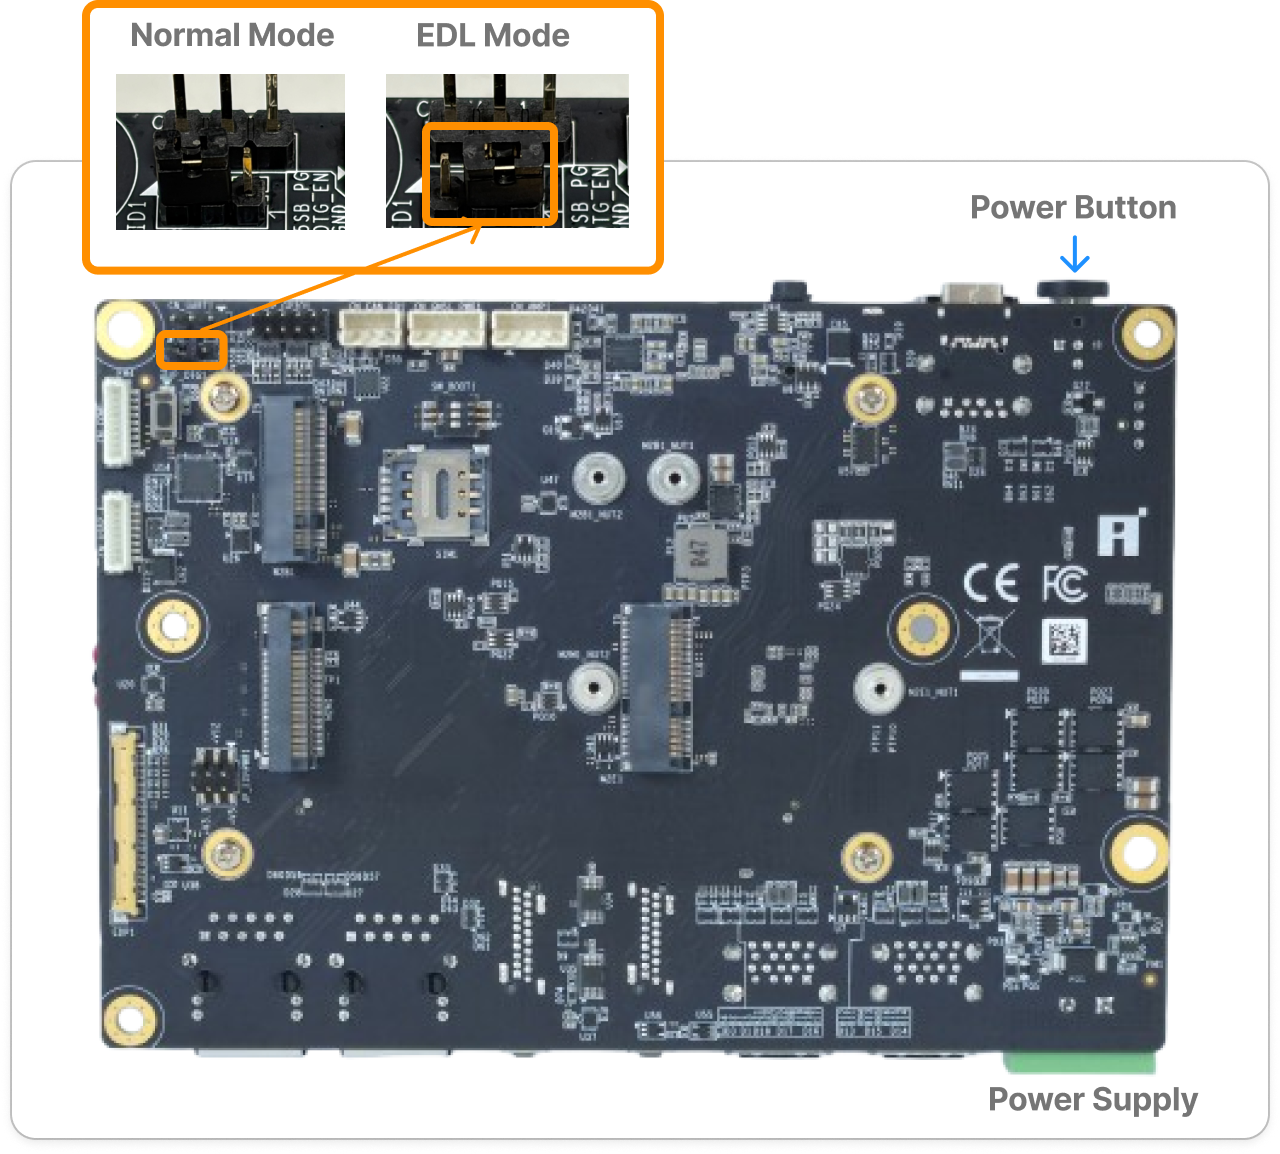
Set the jumper on the bottom side of the board to EDL mode.
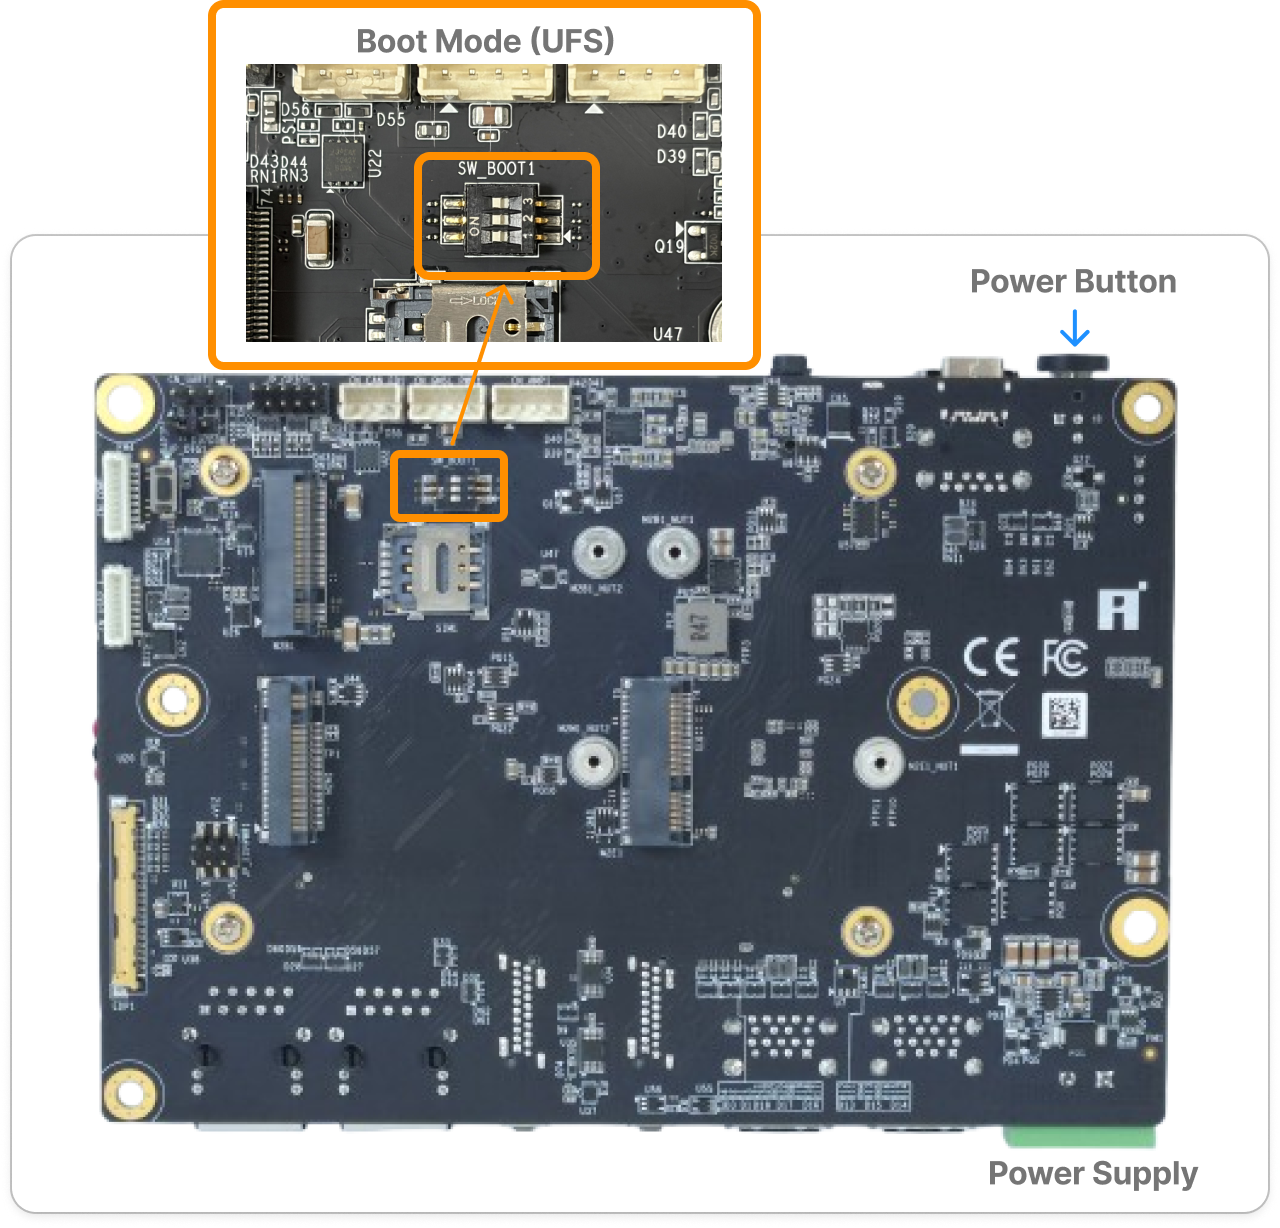
Please also confirm that all boot mode DIP switches are set to ON, as shown below, so the system can boot from UFS. The DIP switches stay in this position for the entire flashing process — only the jumper changes.
Step 2: Connect the Target
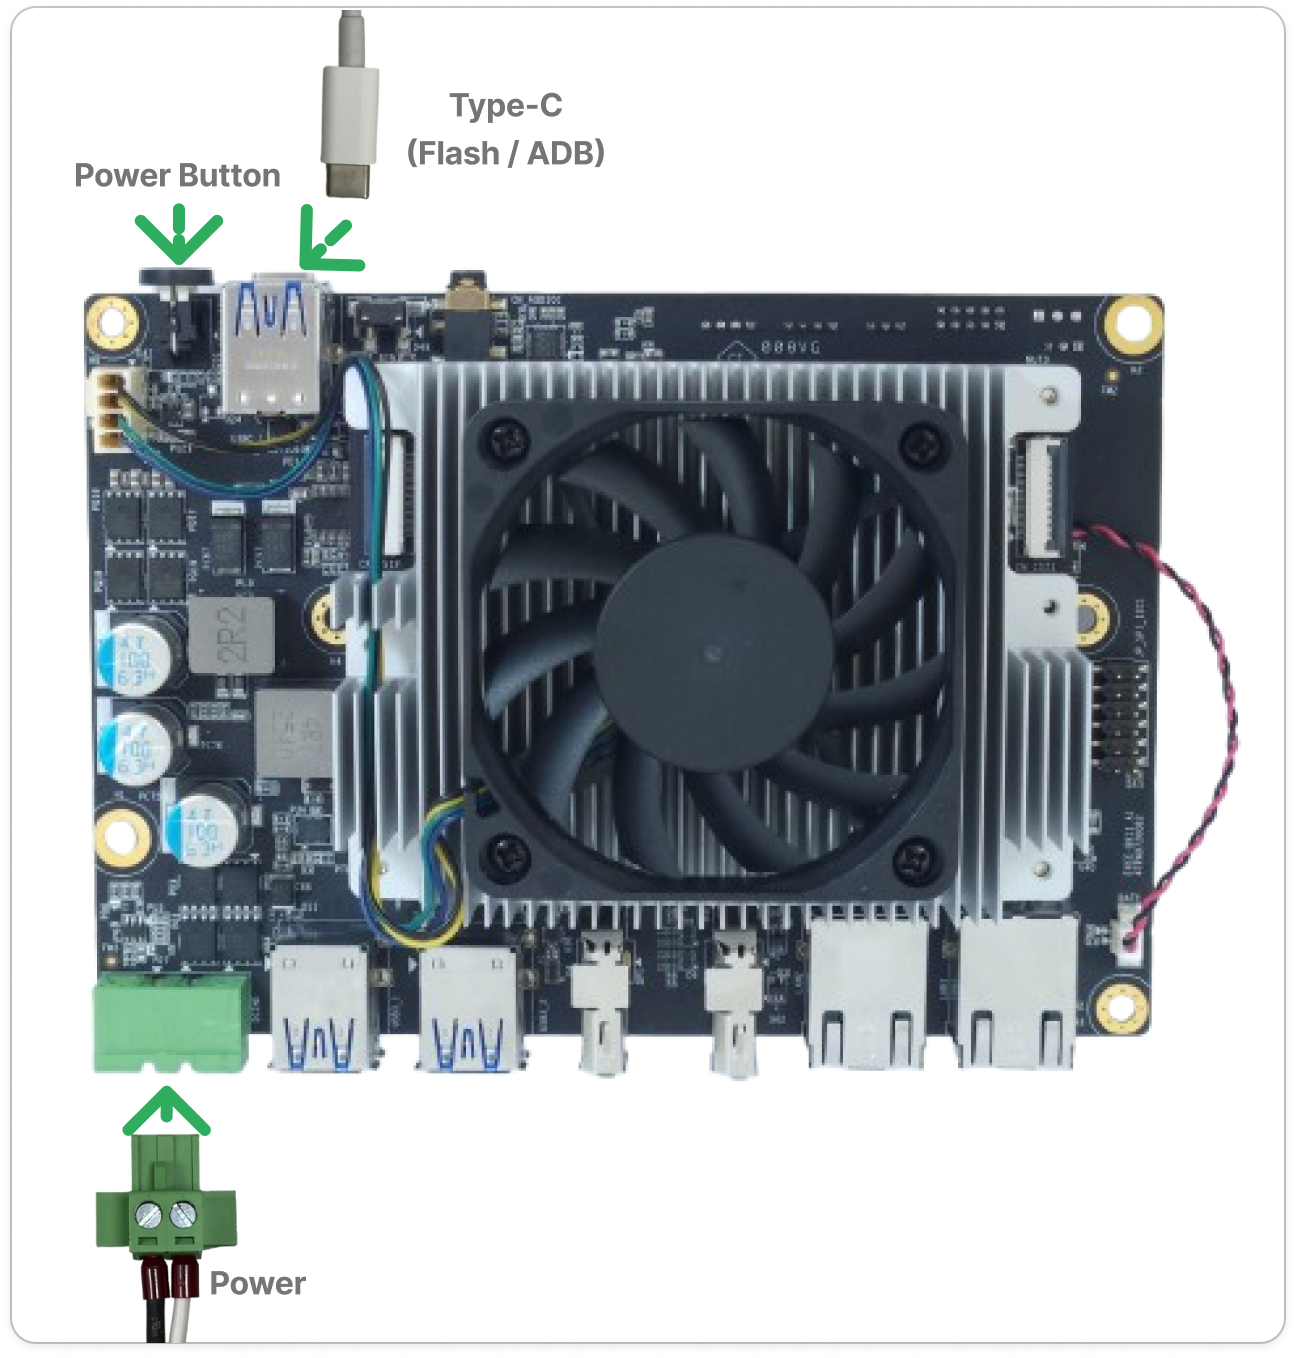
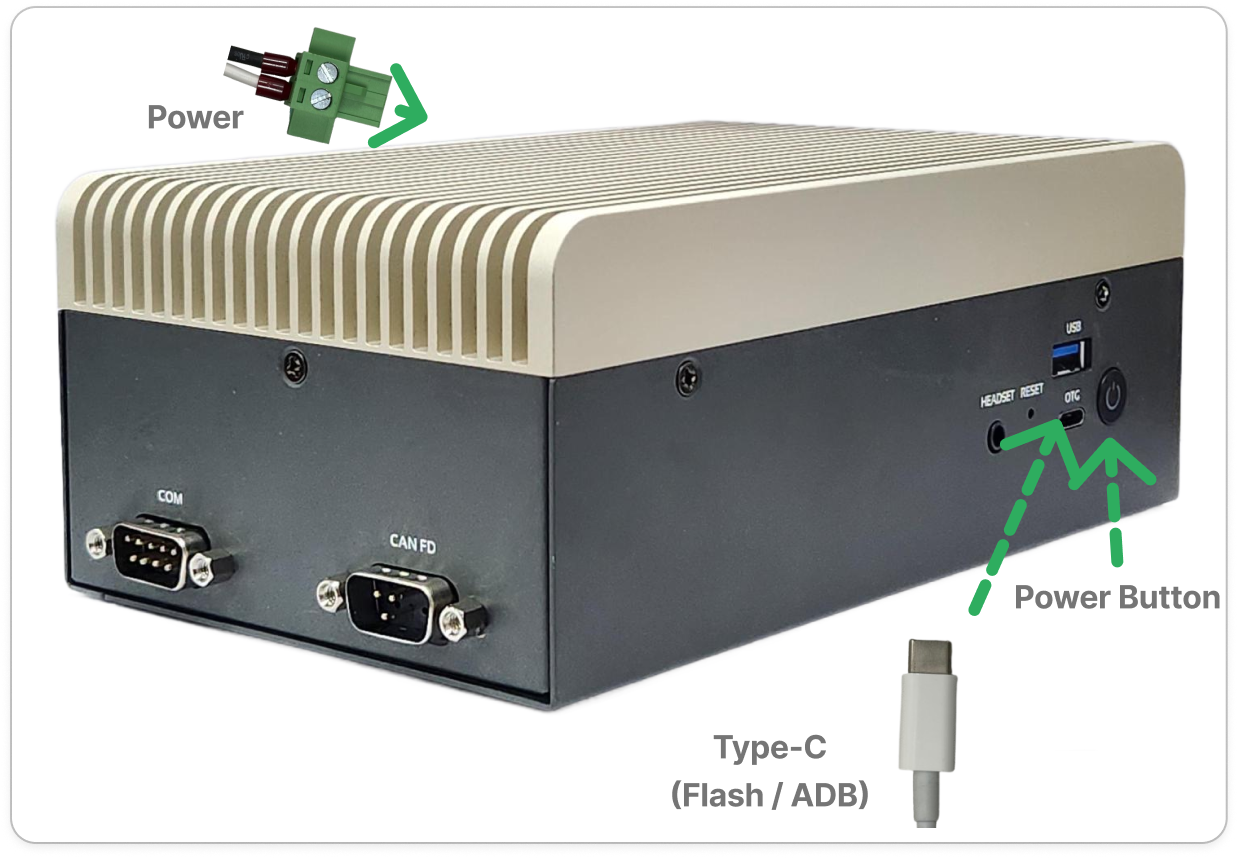
Connect the USB cable between the host (Type-A end) and the port labeled Flash / ADB on the target device (Type-C end).
Step 3: Power On and Verify EDL Mode
Connect the power supply and press the power button.
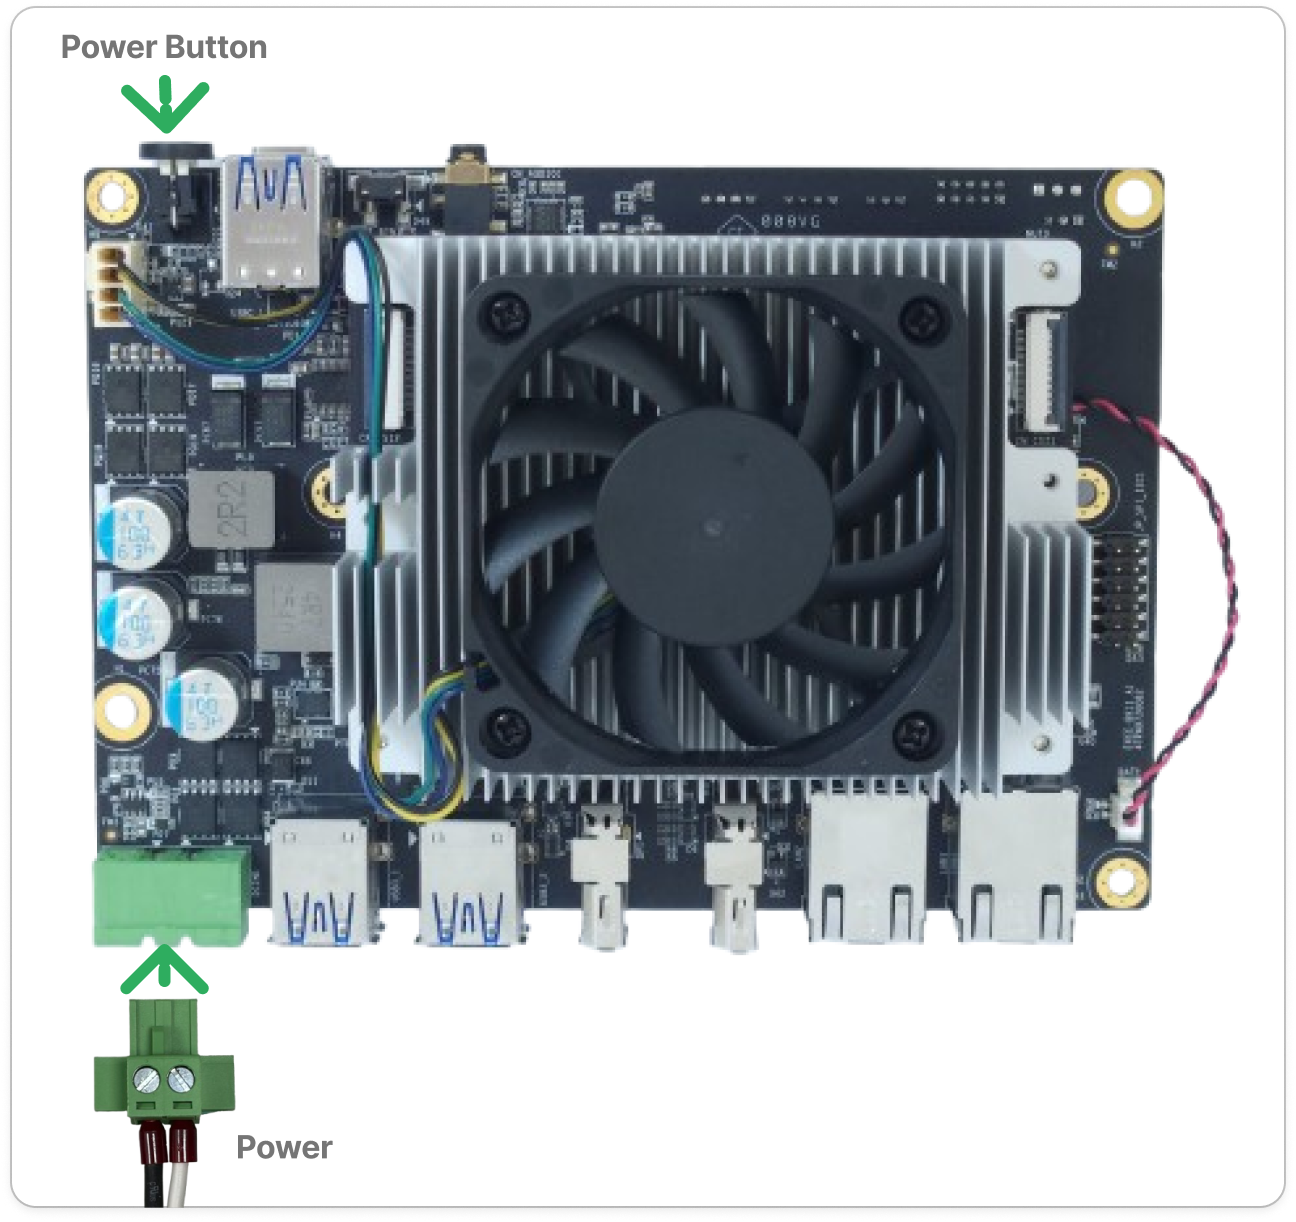
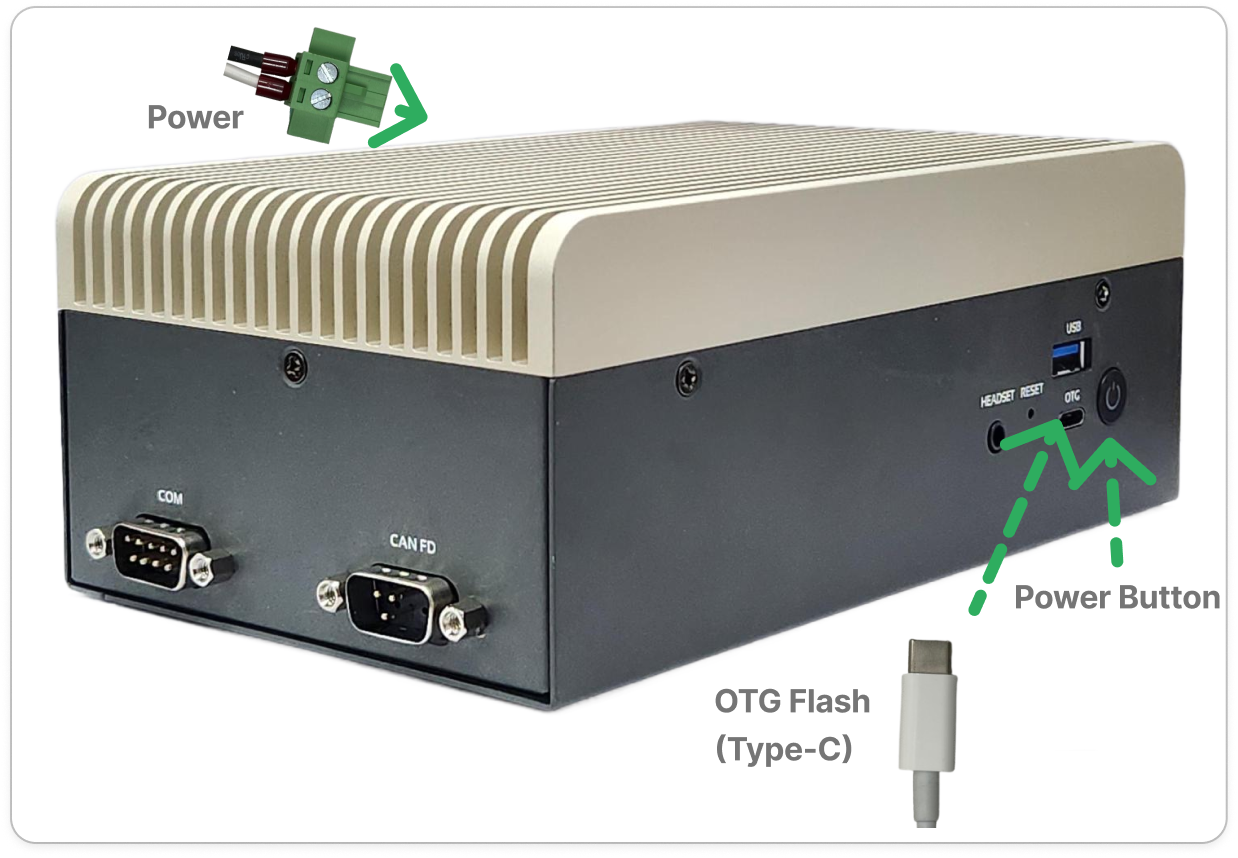
Before flashing, confirm the device has entered EDL mode:
You should see one device like this:
QDL mode and EDL mode are the same thing — it is just a naming difference on Qualcomm’s side.If the device does not show up, see Troubleshooting.
lsusb check for 05c6:9008 is the EDL verification step described there.Step 4: Flash the Image
Extract the image package provided by Innodisk on the host, and enter the folder.
You will see files similar to the list below. Only part of the tree is shown here.
Verify the package integrity with the bundled md5sum.txt. Every file should report OK before you continue.
Flash the image. Run inside the image folder — the whole process takes a few minutes.
If the flashing process completes successfully, you will see output similar to the following.
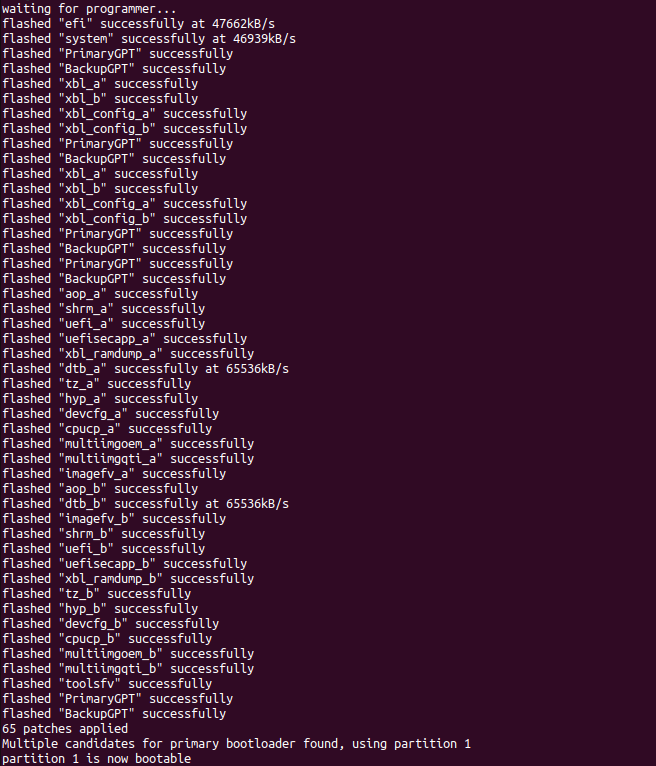
qdl --storage ufs prog_firehose_ddr.elf rawprogram*.xml patch*.xml command; the Innodisk package already bundles all required files, so no extra image-path setup is needed.Step 5: Switch Back to Normal Boot Mode
Power off the device and set the jumper on the bottom side of the board back to Normal mode. The DIP switches need no change — they stay ON the whole time.
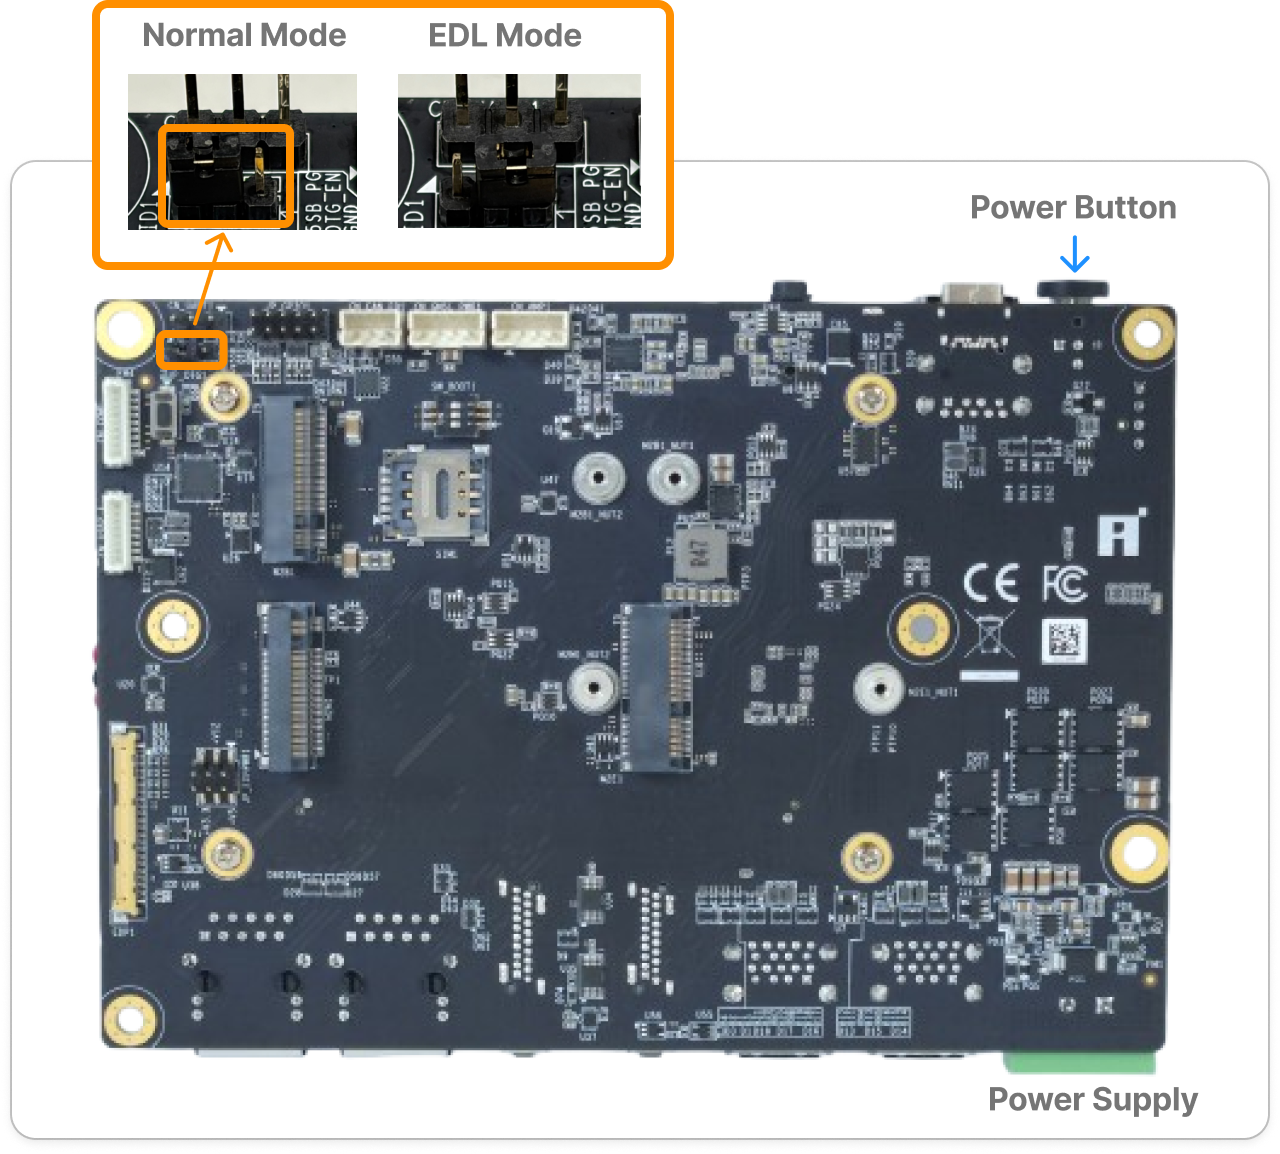
Normal mode.Step 6: Boot and Confirm
Connect a DisplayPort monitor, power on the device, and let it boot. Seeing the system desktop on the screen means the image was flashed successfully.
From here, head back to the Q911 Quick Start Guide → Interact with the System to start using the device (DisplayPort, SSH, ADB, UART).
Troubleshooting
lsusb shows no 05c6:9008 device
- Confirm the jumper is set to
EDL mode(Step 1) and the device is powered on. - Confirm the cable is connected to the
Flash / ADBport and is a data-capable cable, not a charge-only one. - Try another USB port on the host, then power-cycle the device.
qdl fails with a permission error
- The udev rule is missing or not loaded. Set it up as described in Host Setup, restart udev, then unplug and re-plug the USB cable.
Flashing fails midway or reports a Sahara protocol error
- Unplug the power cable, plug it back in, and power on again — the board stays in EDL mode as long as the jumper is unchanged.
- Verify the device is detected again (Step 3), then re-run the flashing command.